
> Laboratory Techniques > PCR and DNA Amplification Methods > Unlock Precision: Your Guide to Real-Time PCR Assay Execution
Unlock Precision: Your Guide to Real-Time PCR Assay Execution
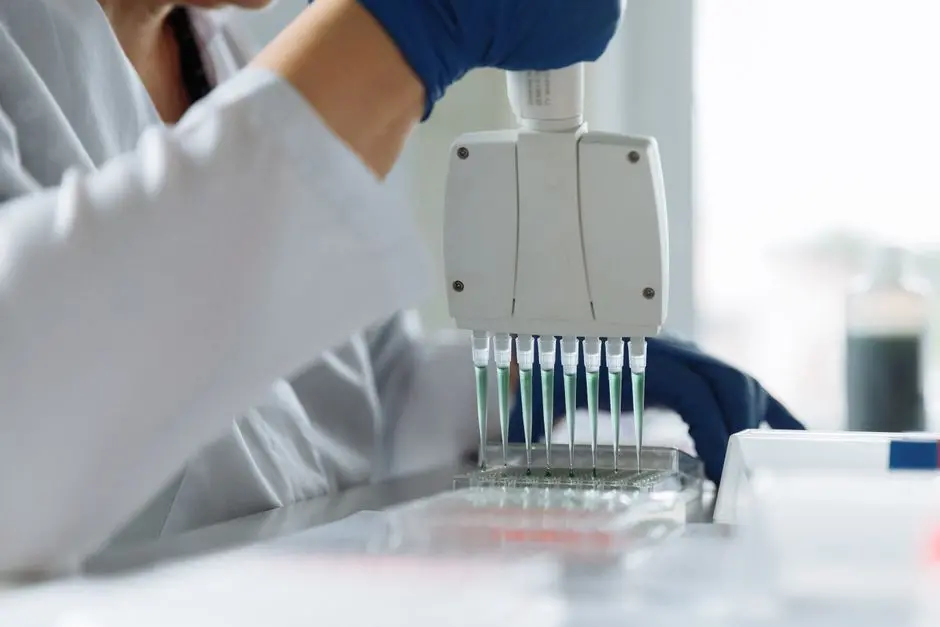
In the relentless pursuit of biological truth, real-time Polymerase Chain Reaction (qPCR) stands as an indispensable technique. Its capacity to quantify nucleic acids with unprecedented sensitivity and specificity has revolutionized fields from gene expression analysis and pathogen detection to cancer research and personalized medicine. Yet, unlocking its full potential demands meticulous execution and a profound understanding of its intricate mechanisms.
This comprehensive guide empowers you to master the real-time PCR assay, transforming a complex protocol into a routine of precision and confidence. We will dissect each critical phase, from meticulous pre-assay planning and reagent preparation to robust data interpretation, ensuring every reaction yields reliable, actionable insights. Navigate the subtleties that differentiate routine results from groundbreaking discoveries and solidify your grasp on modern PCR methodologies for DNA amplification and analysis. Prepare to optimize your workflow, minimize errors, and elevate your experimental outcomes.
Foundations & Pre-Assay Planning: The Blueprint for Success
Embarking on a real-time PCR journey necessitates a meticulously crafted blueprint. We begin by anchoring our understanding in the core principle: the simultaneous amplification and quantification of DNA via fluorescent detection. The accumulation of fluorescence, directly proportional to the amount of amplified DNA, allows us to pinpoint the Cycle threshold (Cq) – the cycle number where fluorescence crosses a predetermined threshold. This Cq value serves as an inverse proxy for the initial target quantity.
Before even touching a pipette, we forge our experimental design. This includes defining our biological question, selecting appropriate controls (e.g., a No-Template Control (NTC) to detect contamination, positive/negative controls for assay validation, and RNA/DNA quality controls to assess integrity and concentration), and choosing a suitable quantification method (absolute vs. relative). We then meticulously design or select primers and probes, ensuring specificity (minimal off-target amplification), efficiency (near 100% amplification per cycle), and freedom from secondary structures. Reagent selection – the optimal master mix, reverse transcriptase (for RT-qPCR), and RNase inhibitors – profoundly impacts performance. Finally, regular instrument calibration and maintenance are paramount; a precise thermal cycler is our non-negotiable ally.
Reagent Preparation & Reaction Setup: Orchestrating Precision
Precision in real-time PCR pivots on the meticulous preparation and handling of reagents. We initiate by assembling the master mix, the homogeneous blend of essential components excluding the template. This typically comprises the DNA polymerase, dNTPs, reaction buffer, magnesium chloride, forward and reverse primers, the fluorescent probe (if using a probe-based assay), and nuclease-free water. We prepare this master mix in a dedicated clean area, minimizing exposure to airborne contaminants. Critical steps include calculating component volumes accurately, often using a slight excess (e.g., 10%) to account for pipetting losses, and thorough, gentle mixing by vortexing and brief centrifugation.
Handling RNA and DNA templates demands stringent measures. We aliquot samples to avoid freeze-thaw cycles, quantify them accurately, and assess their purity (A260/A280 and A260/A230 ratios) to preempt inhibition. To combat the pervasive threat of contamination – particularly from previously amplified PCR products (amplicons) – we establish rigorous laboratory practices: dedicated pre-PCR and post-PCR areas, aerosol-barrier pipette tips, frequent glove changes, and regular decontamination of workspaces with 10% bleach followed by ethanol. Our plate layout strategies are deliberate, ensuring replicates are organized logically and controls are strategically placed to identify potential issues swiftly. We pipette with unwavering accuracy, ensuring consistent volumes across all wells to maintain reaction integrity.

Thermal Cycling & Data Acquisition: Monitoring the Amplification Journey
With our plates meticulously loaded, we transition to programming the thermocycler, the engine of our amplification. The standard thermal cycling protocol for qPCR typically comprises three main stages. First, an initial denaturation phase (e.g., 95°C for 5-10 minutes) activates the DNA polymerase and fully denatures template DNA. This is often followed by 40-50 cycles of amplification, each consisting of: denaturation (e.g., 95°C for 15-30 seconds) to separate DNA strands; annealing (e.g., 55-65°C for 30-60 seconds), where primers and probes bind to their specific targets; and extension (e.g., 72°C for 30-60 seconds), where the polymerase synthesizes new DNA strands. The annealing and extension steps are often combined for faster protocols.
Crucially, during the annealing/extension phase of each cycle, the instrument captures the fluorescence signal. The detection mechanism relies on fluorophores (like SYBR Green I, which binds to double-stranded DNA, or TaqMan probes, which are cleaved during extension, separating a reporter dye from a quencher). We set data collection parameters, including the appropriate gain settings for fluorescence channels and the use of passive reference dyes (e.g., ROX) to normalize non-PCR related fluorescence fluctuations between wells. Real-time monitoring of amplification curves, visible as the reaction progresses, provides immediate feedback on assay performance, signaling potential issues such as low amplification or primer dimers early in the process.

Post-Run Analysis & Interpretation: Extracting Biological Insights
The raw fluorescence data from the thermocycler serves as the foundation for our biological insights. Our first step involves determining the Cq (quantification cycle) value for each reaction. This is the point where the fluorescence signal rises above the background noise and enters the exponential phase of amplification. Software algorithms automatically set baselines and thresholds, but expert review and manual adjustment, when necessary, are crucial to ensure accuracy and consistency across samples. For SYBR Green-based assays, a melting curve analysis (or dissociation curve) typically follows amplification. This step, where the temperature is gradually increased to denature the DNA and monitor fluorescence decrease, identifies primer dimers and nonspecific products, which would appear as distinct peaks at different melting temperatures from the specific amplicon.
Data normalization is indispensable for accurate relative quantification. We utilize carefully validated reference genes (housekeeping genes) whose expression remains stable across experimental conditions. By comparing the Cq of our target gene to that of a reference gene, we account for variations in starting material and reverse transcription efficiency. We distinguish between absolute quantification (using a standard curve of known concentrations) and relative quantification (comparing target expression between samples, often using the 2-ΔΔCq method). Common pitfalls include amplification failure, high Cq variability, and the presence of primer dimers. Troubleshooting involves re-evaluating primer design, optimizing annealing temperatures, checking template quality, and ensuring reagent integrity. Ultimately, rigorous statistical analysis and transparent reporting of results are paramount for scientific credibility and reproducibility.
Key Takeaways
Mastering qPCR Foundations
Understand the core principle of qPCR: simultaneous amplification and quantification via fluorescence. The Cq value inversely correlates with initial target quantity. Meticulous planning involves defining the biological question, selecting appropriate controls (NTC, positive/negative, quality), and choosing quantification methods. Primer/probe design must prioritize specificity and efficiency. Regular instrument calibration is critical.
Precision in Reagent Preparation
Assemble the master mix (polymerase, dNTPs, buffer, MgCl2, primers, probe, water) in a clean area, accounting for pipetting losses. Handle RNA/DNA templates with care, aliquot to avoid freeze-thaw, and quantify accurately. Combat contamination with dedicated areas, aerosol-barrier tips, glove changes, and decontamination. Ensure accurate pipetting and logical plate layouts.
Thermal Cycling & Data Acquisition Essentials
Program the thermocycler with initial denaturation, followed by 40-50 cycles of denaturation, annealing, and extension. Fluorescence detection occurs during the annealing/extension phase, capturing signals from intercalating dyes or cleaved probes. Set appropriate gain settings and utilize passive reference dyes (ROX) for normalization. Monitor amplification curves in real-time for immediate performance feedback.
Robust Data Analysis & Interpretation
Determine Cq values by setting baselines and thresholds. For SYBR Green, perform melting curve analysis to detect non-specific products. Normalize data using validated reference genes (housekeeping genes) stable across conditions. Distinguish between absolute (standard curve) and relative (e.g., 2-ΔΔCq) quantification. Troubleshoot issues like amplification failure or primer dimers by reassessing design, optimization, and quality. Ensure statistical rigor and transparent reporting.
FAQ
-
What is the ideal Cq range for reliable qPCR data?
Generally, a Cq value between 15 and 30 is considered ideal, reflecting efficient amplification and sufficient target concentration. Cq values <15 might indicate an excessively high starting template, potentially consuming reagents too quickly, while Cq values >35-40 often fall into the stochastic phase of amplification, making them less reliable and prone to background noise or non-specific amplification.
-
How do I choose appropriate reference genes for my qPCR experiment?
Reference genes, or housekeeping genes, must exhibit stable expression across all experimental conditions, tissues, and treatments. We do not assume stability; instead, we validate potential reference genes (e.g., GAPDH, β-actin, 18S rRNA) experimentally using software like geNorm or NormFinder. Utilizing multiple validated reference genes provides greater confidence in data normalization.
-
What are common causes of primer dimers in qPCR and how can I prevent them?
Primer dimers result from primers annealing to each other instead of the target sequence and being amplified. Common causes include poor primer design (complementarity between primers), high primer concentration, or non-optimal annealing temperatures. Prevention strategies include careful primer design using bioinformatics tools, optimizing primer concentrations (typically 200-500 nM each), using hot-start polymerases, and optimizing the annealing temperature through gradient PCR.
-
Why is my No-Template Control (NTC) showing amplification?
Amplification in the NTC is a critical indicator of contamination. This contamination can be from previously amplified PCR products (amplicons), genomic DNA, or even reagent contamination. We mitigate this by using dedicated pre-PCR/post-PCR workspaces, aerosol-barrier tips, fresh reagents, frequent glove changes, and routinely decontaminating equipment and surfaces with DNA-degrading solutions (e.g., 10% bleach, followed by ethanol) or UV irradiation.
-
What is the fundamental difference between SYBR Green and probe-based (e.g., TaqMan) qPCR chemistries?
The key difference lies in their detection mechanisms. SYBR Green is an intercalating dye that binds non-specifically to any double-stranded DNA during amplification, including specific amplicons and non-specific products like primer dimers. Probe-based assays (e.g., TaqMan) utilize sequence-specific oligonucleotide probes labeled with a fluorophore and a quencher. When the probe is intact, the quencher suppresses the reporter signal. During amplification, the 5'–3' exonuclease activity of the polymerase cleaves the probe, separating the reporter from the quencher and leading to a detectable fluorescent signal, offering superior specificity but at a higher cost.